Contacts can be added and updated in Payreq Delivery using the Payreq API.
This method is generally used where a Mailer, mailhouse or technology partner wants to maintain Contact records directly from another system, such as a billing, payroll, or CRM platform.
The API is suitable for automated Contact updates, recurring synchronisation and larger operational workflows where manual console updates or SFTP files are not preferred.
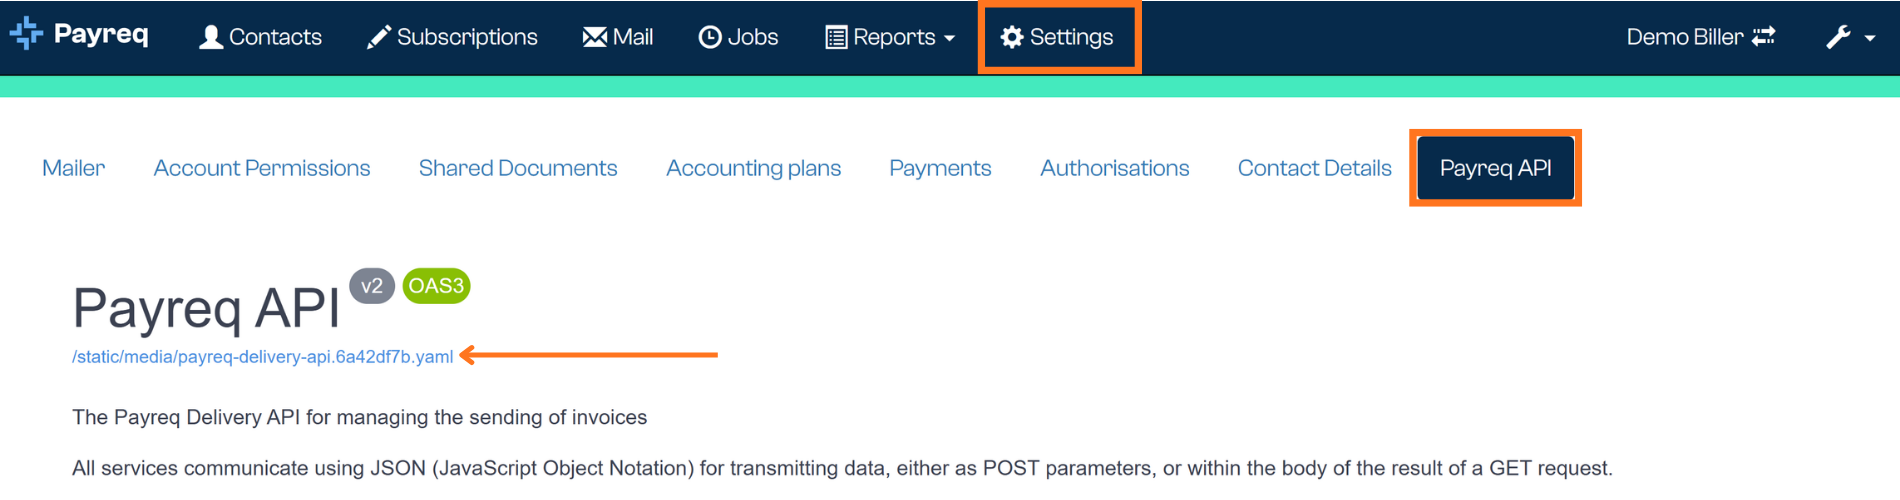
More information can be found in the Payreq Interface Specification or in the Payreq API tab under Settings:
What the Contacts API is used for
The Contacts API allows an authorised API user to send Contact records to Payreq Delivery. Depending on the endpoint used, the API can:
- Add new Contacts
- Update existing Contacts
- Replace the full Contact list for a Mailer
- Submit Contact updates as a background job for larger files or larger data volumes
Payreq uses Contact data to help identify customers, match subscription requests and support digital delivery.
Before You Begin
Before using the Contacts API, confirm that:
- Your organisation has been set up for Payreq API access (see Managing Payreq Delivery Users)
- You have an API user with access to the relevant Payreq Delivery account
- You know the correct biller-code
- Your Contact field configuration has been confirmed
- You understand whether your update should add/update Contacts or replace the full Contact list
- You have tested the process before using it for production Contact updates
The values required in the API should align with the Contact Field Settings configured for your Payreq Delivery account.
For more information see Understanding Contact Field Settings.
Authentication
To use the Payreq API, you must first authenticate and retrieve an API token.
Once a token has been returned, include it in the Authorization header for subsequent API requests.
The header format is:
Authorization: Token <token>
API tokens are time limited, so integrations should be designed to request a new token when required.
Contact API Endpoints
The Contacts API includes four main endpoints for adding or updating Contacts.
Endpoint | Purpose |
POST /biller/{biller-code}/contacts/add | Adds new Contacts and updates existing Contacts. |
POST /biller/{biller-code}/contacts/replace | Replaces the Contacts for the Mailer with the Contacts supplied in the request. |
POST /biller/{biller-code}/contacts/job/add | Adds or updates Contacts as a background job. Recommended for larger Contact volumes. |
POST /biller/{biller-code}/contacts/job/replace | Replaces Contacts as a background job. Recommended for larger Contact volumes. |
Choosing the correct Endpoint
Add Contacts
Use the add endpoint when you want to add new Contacts or update matching existing Contacts.
If a Contact already exists with the same biller-account-number, the details for that Contact will be replaced with the values supplied in the request.
Use this option for incremental updates, such as:
- Adding new customers or accounts
- Updating changed customer details
- Correcting existing Contact information
- Maintaining Contact data as part of a regular synchronisation process
Replace Contacts
Use the replace endpoint only when the API request contains the full Contact list that should remain in Payreq Delivery.
This option should be used carefully, because it is intended to refresh or replace the existing Contact set for the Mailer.
Before using a replace endpoint, confirm that:
- The request contains all required Contacts
- Existing account identifiers have been retained where appropriate
- The possible effect on active subscriptions has been considered
- The update has been tested and reviewed
- The person or system submitting the request is authorised to perform a full Contact replacement
Job Endpoints
For larger Contact volumes, use the job endpoints:
- POST /biller/{biller-code}/contacts/job/add
- POST /biller/{biller-code}/contacts/job/replace
These endpoints submit the Contact update as a background job and return a job ID.
After submitting the job, use the job status endpoint to monitor processing:
GET /biller/{biller-code}/jobs/{job-id}
The job status may indicate whether the job is still in progress, has completed or has failed.
Contact Data
The Contacts API accepts a JSON array of Contact records.
Each Contact must include:
- biller-account-number
- name
Additional fields may be included depending on your organisation’s Contact Field Settings. Confirm your field mapping before sending Contact updates.
Example Contact Payload
The following is a simplified example only.
[
{
"biller-account-number": "123456",
"name": "Sam Smith",
"contact-id-1": "123456",
"contact-id-2": "Mr S Smith",
"contact-id-3": "GA123",
"address-1": "1 Example Street",
"municipality": "Melbourne",
"province": "VIC",
"country": "Australia",
"postal-code": "3000"
},
{
"biller-account-number": "789012",
"name": "Jane Example",
"contact-id-1": "789012",
"contact-id-2": "Ms J Example",
"contact-id-3": "GA456"
}
]
In this example:
- biller-account-number identifies the Contact record
- name is the customer name stored against the Contact
- contact-id-1 stores the configured ID value
- contact-id-2 stores the configured authorisation value
- contact-id-3 stores an optional Notice ID or Group ID
The exact fields used by your organisation may be different.
Recommended Process
A typical API Contact update process is:
- Retrieve API token
- Prepare the Contact records in the required JSON format
- Validate that each Contact includes the required fields
- Submit the request to the appropriate Contact endpoint
- Check the API response
- For job endpoints, poll the job status endpoint until processing is complete
- Investigate any errors or unexpected results
- Confirm that the expected Contact records are visible in Payreq Delivery
Reviewing the response
For standard add or replace requests, a successful response may return a count of processed Contacts and the relevant biller code.
For job requests, a successful response returns a job ID. Use this job ID to check the processing status.
If a request fails, review the error response and correct the issue before submitting the request again.
Common validation issues
Common issues include:
- Missing required fields
- Invalid JSON format
- Duplicate biller-account-number values in the same request
- Incorrect biller-account-number length
- Contact field values that do not match the configured field requirements
- Attempting to replace Contacts with an incomplete or unexpected Contact list
- Using the wrong biller-code
- Using an expired or incorrectly formatted authentication token
Was this article helpful?
That’s Great!
Thank you for your feedback
Sorry! We couldn't be helpful
Thank you for your feedback
Feedback sent
We appreciate your effort and will try to fix the article