Importing Contacts from a CSV file
A CSV import can be used to add or update multiple Contacts through the Payreq Delivery console.
Before you begin
To add or update Contacts, you must have permission to manage Contacts for the relevant Payreq Delivery account.
Before making a change:
- Check that you are working in the correct Payreq Delivery account
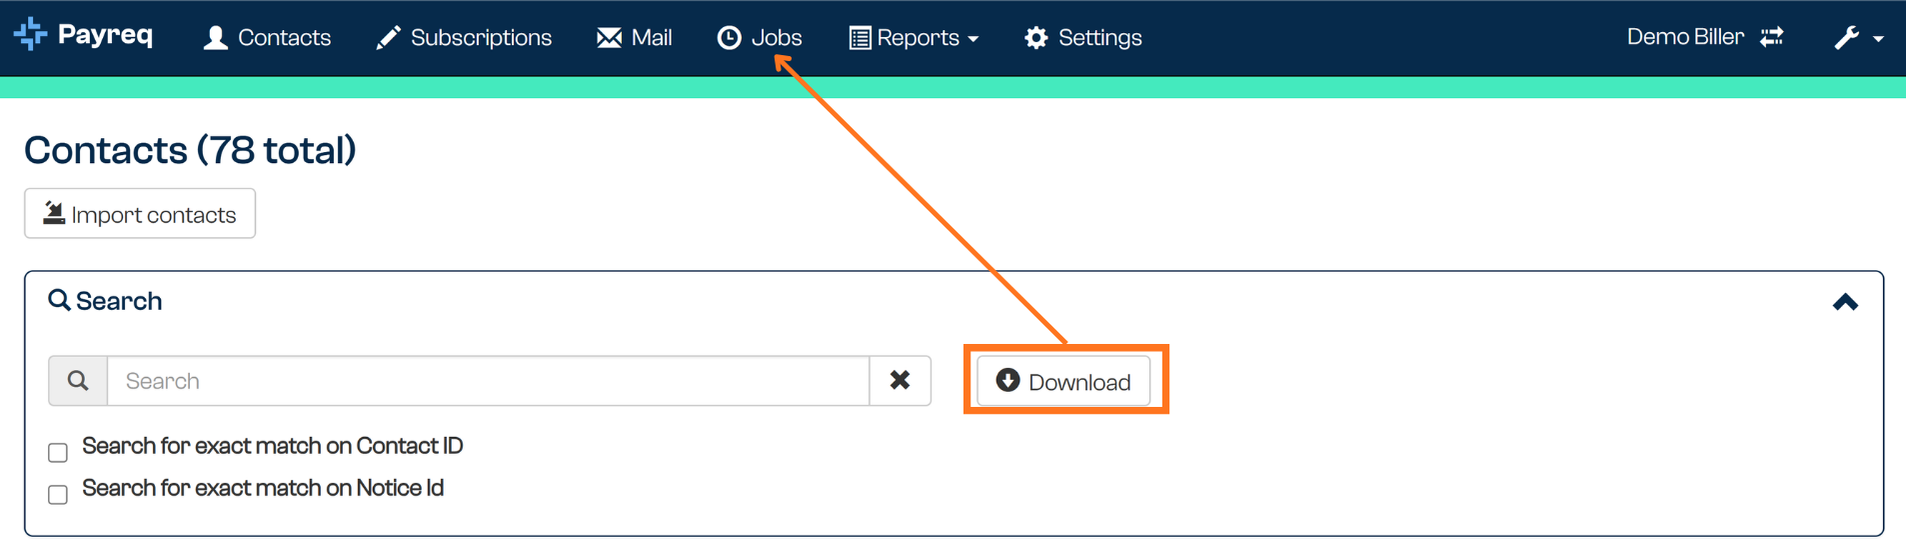
- Download a copy of the current Contact list as a back up (this will be logged and the file made available from the Jobs tab)
CSV format
There are two formatting requirements for the CSV upload:
- Columns and Headers should match what is displayed in the Contacts tab
- A Trailer that counts the total number of records/rows in the file


A sample template of your specific format can be retrieved from the Import Contacts tool. All you need to do is:
- Copy the values from the box and paste into Excel
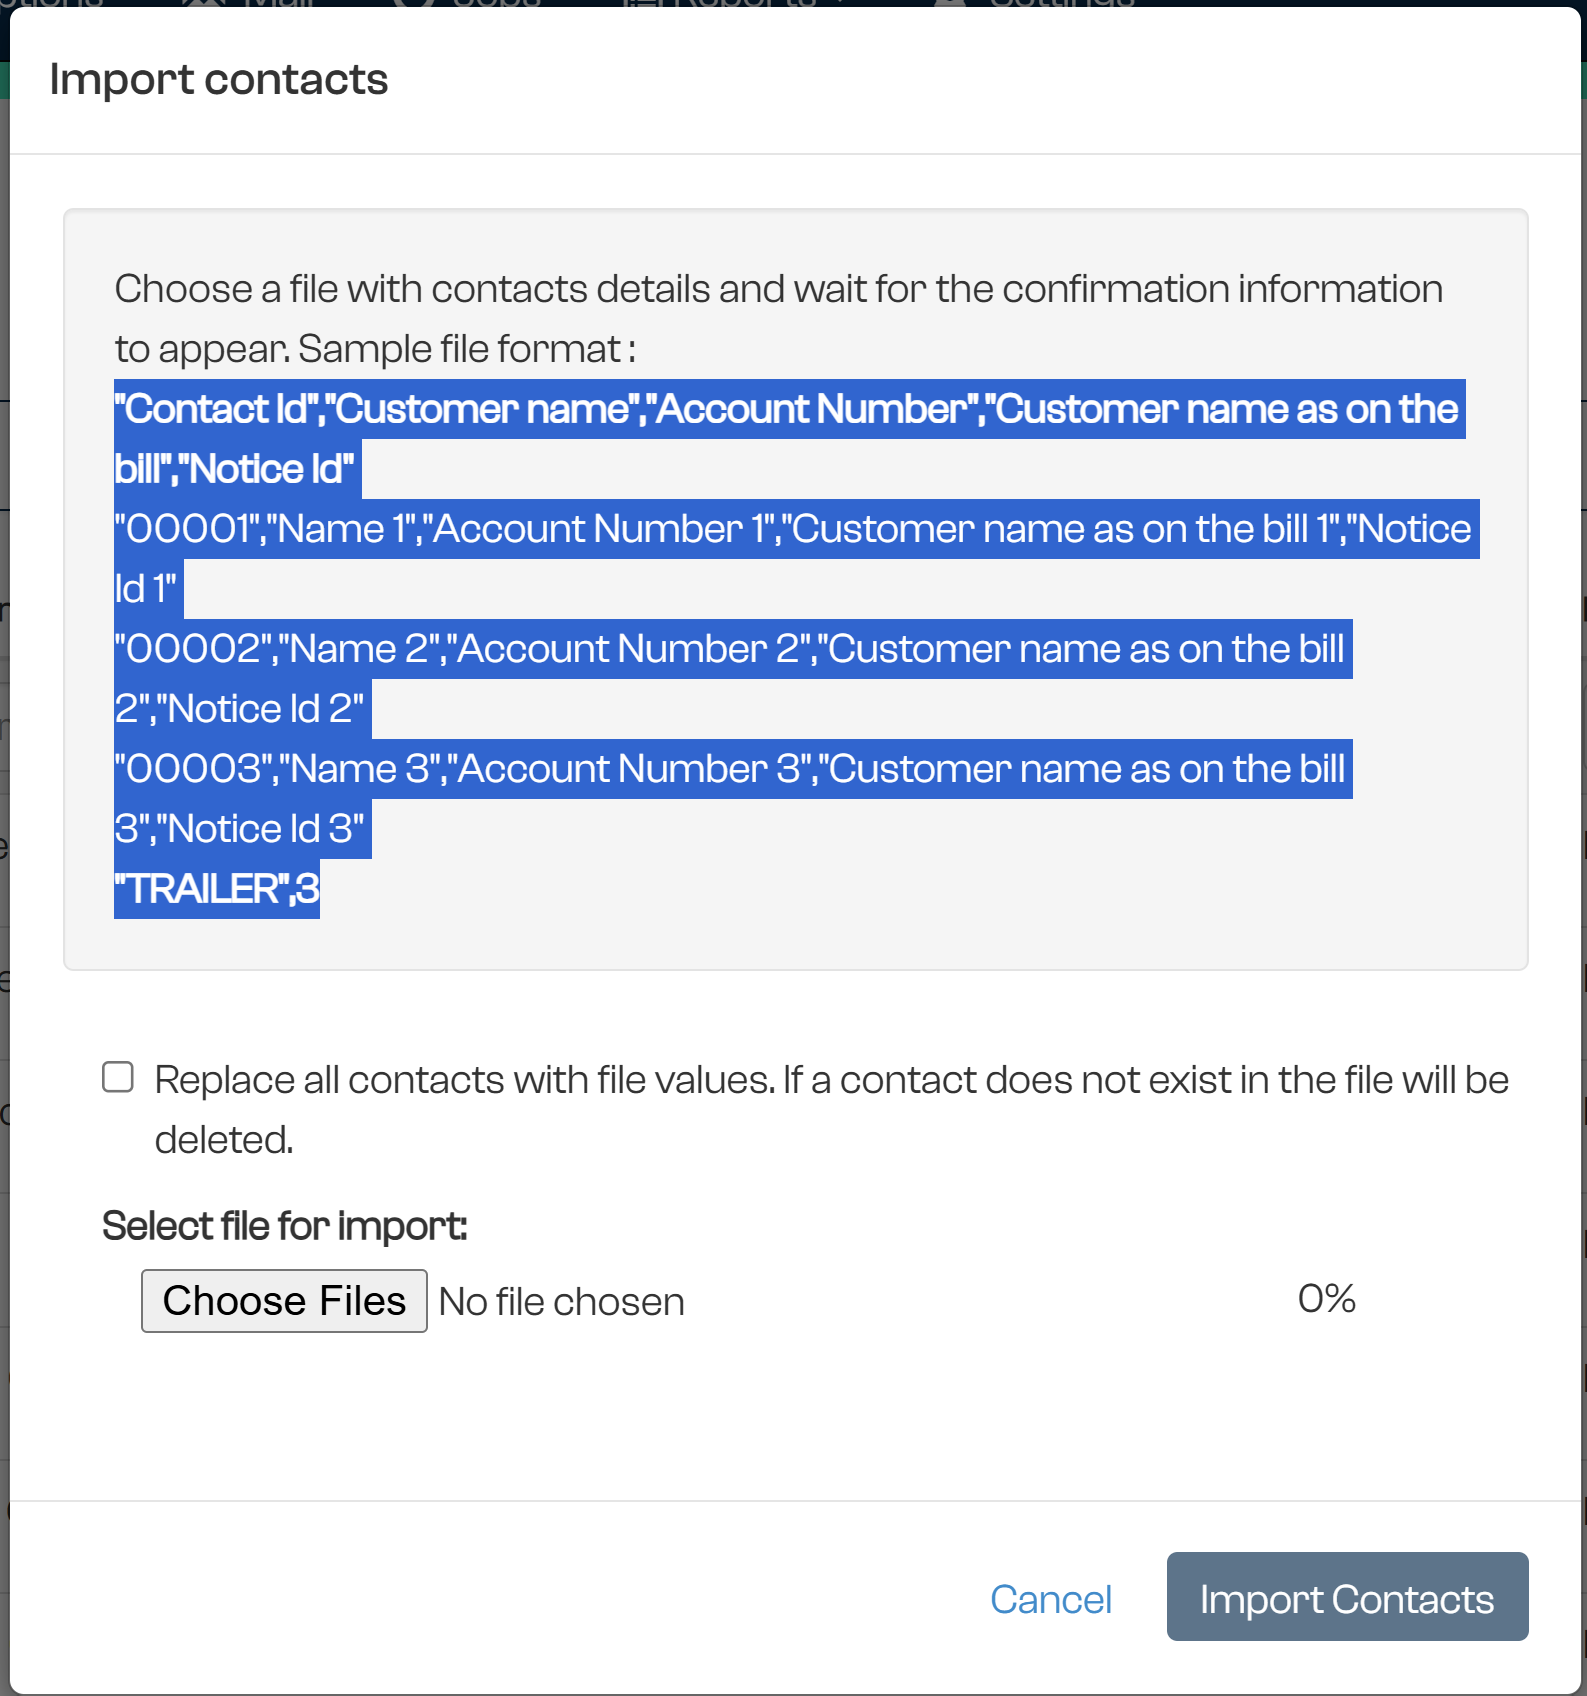
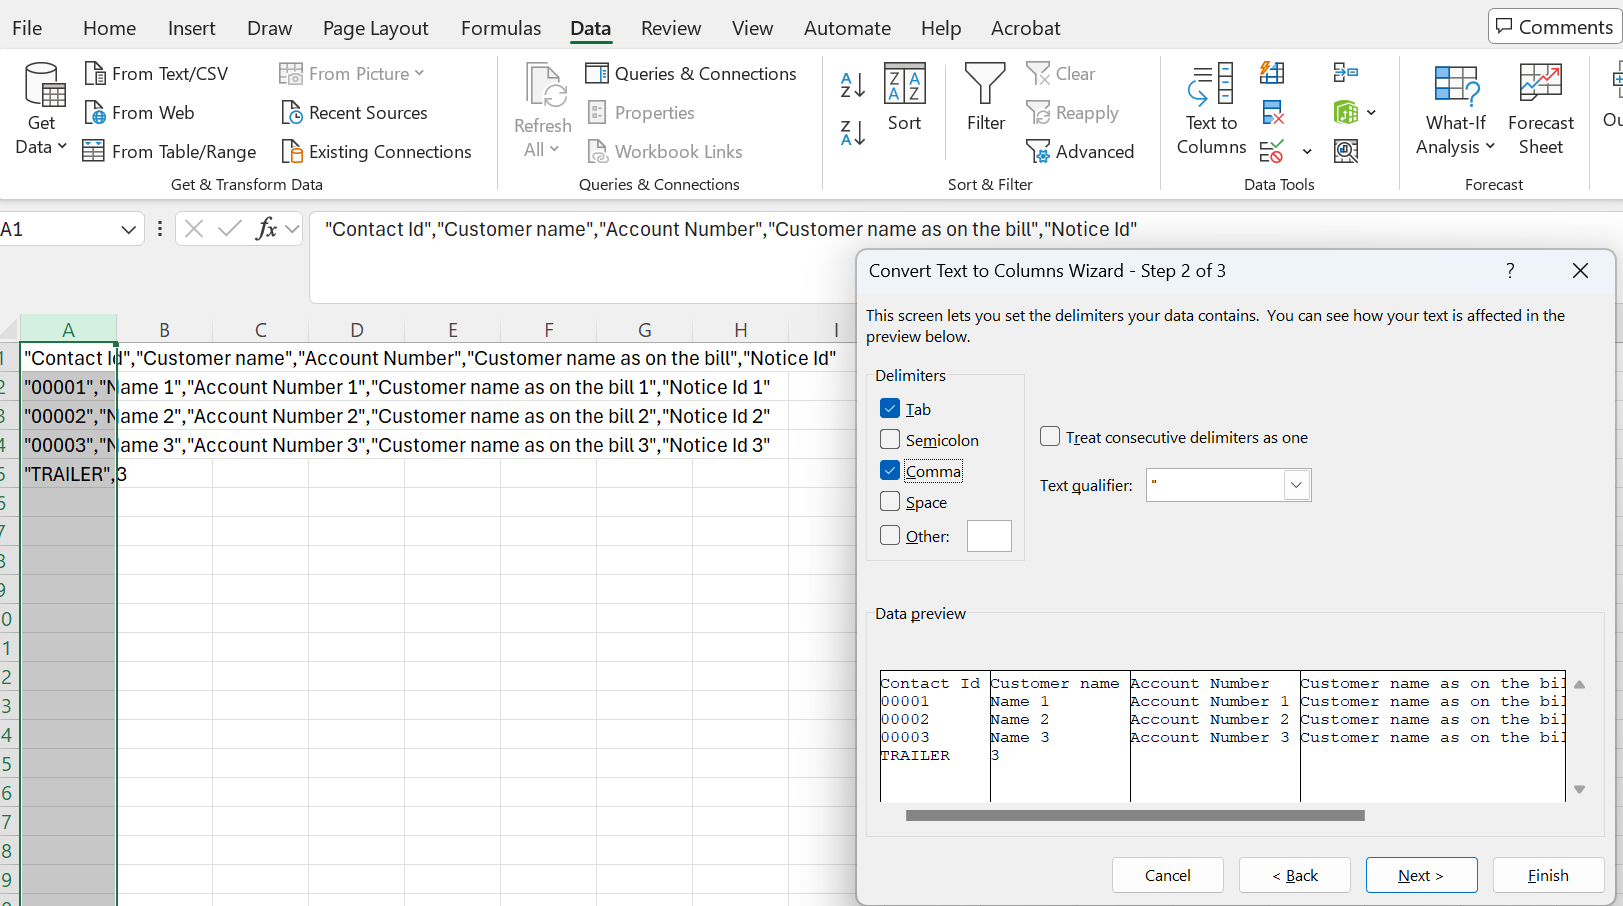
- Use the Text to Columns tool to separate by commas
Things to check
Before importing a file, make sure that:
- The file is saved in CSV format
- The required column headings are present
- The TRAILER (record count) is present and accurate
- There are no duplicate records or blank cells (a NONE value or similar can be entered when necessary)
- Required identifiers have not been removed or altered unintentionally (e.g. leading zeroes removed or long number values being converted to scientific notation)
- Understand whether the upload is incremental or intended to replace the existing Contact list
Ready to import
To import Contacts:
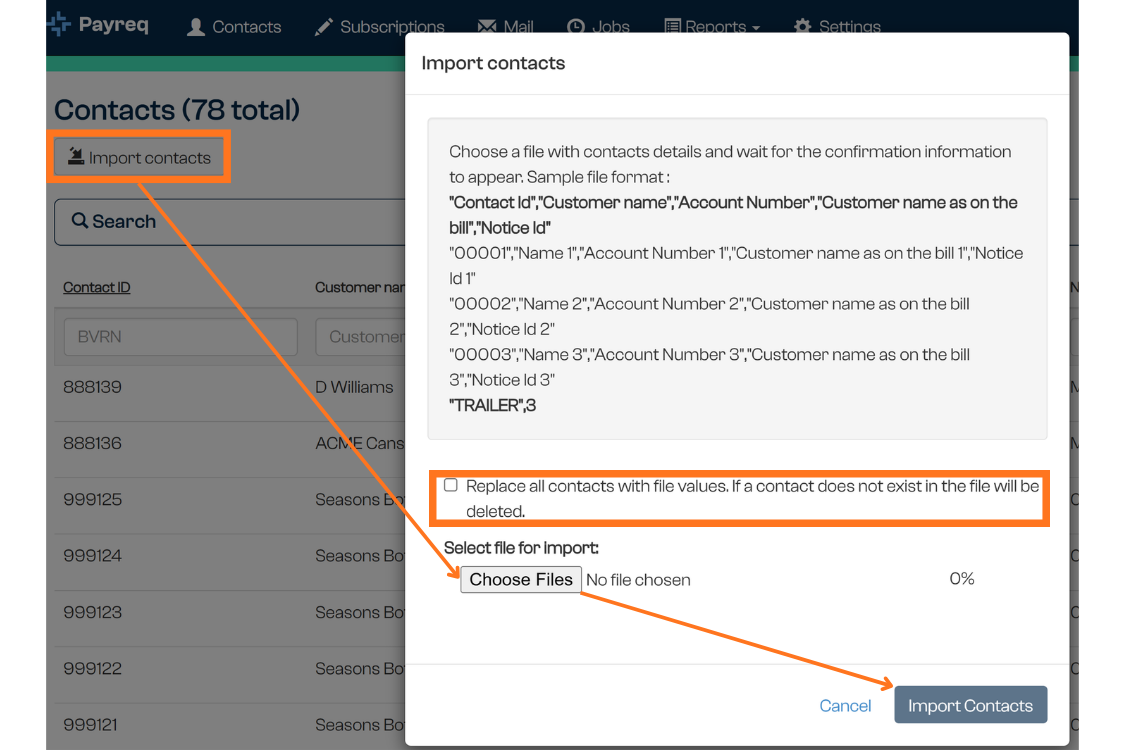
- Select Import Contacts
- Select the CSV file from your computer
- Decide whether you wish to replace all Contacts with file values (if a Contact does not exist in the file, it will be deleted)
- Select Import Contacts to begin processing the file
Replacing the existing Contact list
The import window includes a Replace all contacts with file values option.
Only select this option when the CSV file contains the complete Contact list that should remain in Payreq Delivery. Contacts that are not included in a replacement file may be removed or made inactive as part of the import.
For a partial or incremental Contact file, leave the replacement option unselected.
Adding or updating individual Contacts
Adding an new single Contact
To add a new Contact record:
- Enter the required Contact information
- Select Create to save the record
Fields marked as required must be completed before the Contact can be created.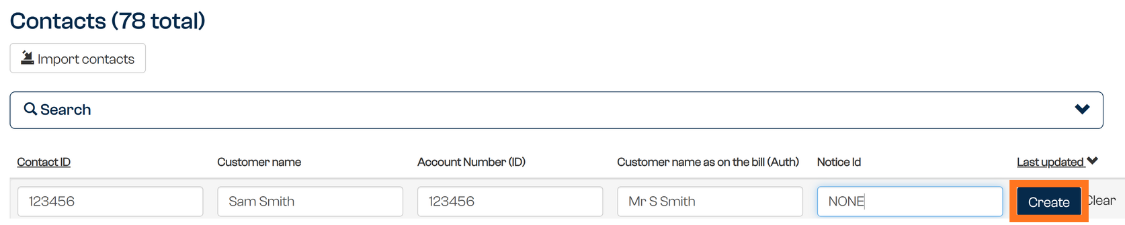
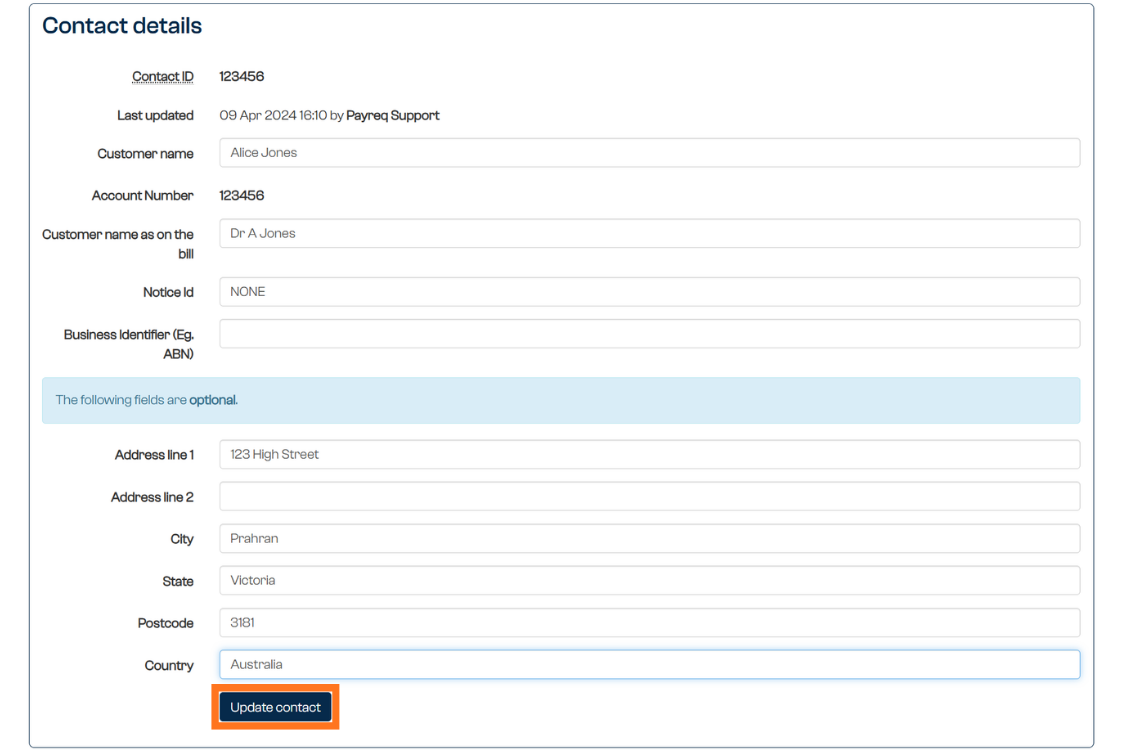
Updating an individual Contact
To update a Contact:
- Select the Contact to open its details
- Update the required fields
- Review changes for accuracy and select Update Contact to save
Removing an individual Contact
A Contact should only be removed when the record is no longer required and the effect on any associated subscriptions has been considered.
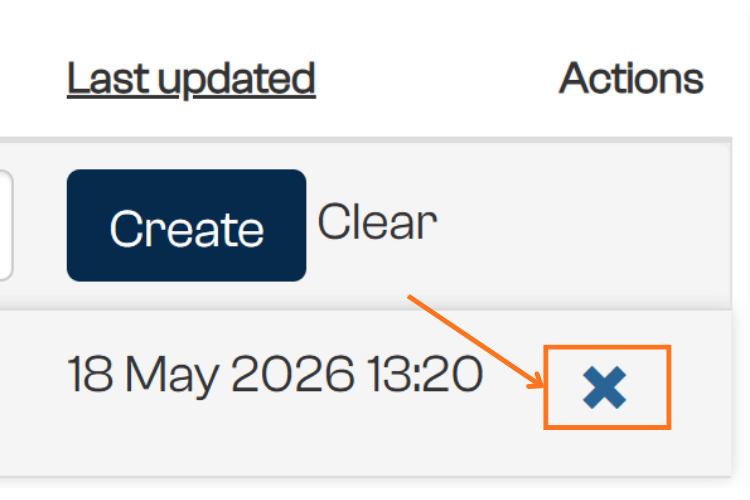
To remove a Contact, click the blue X “Delete Contact” on the right-hand side of the record row.
Do not remove a Contact solely because customer information has changed. Where the account or Contact remains valid, update the existing record instead.
Was this article helpful?
That’s Great!
Thank you for your feedback
Sorry! We couldn't be helpful
Thank you for your feedback
Feedback sent
We appreciate your effort and will try to fix the article